Showing posts with label bag. Show all posts

Wednesday, May 18, 2011

Making Gifts | Favor Bags


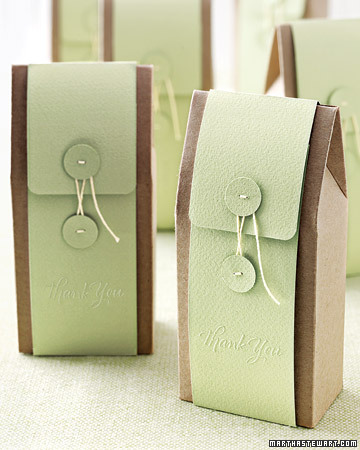
Cut paper strip long enough to encircle box and overlap slightly; round top corners with a craft punch. Wrap strip around box, folding where needed; emboss message.

Use 3/4-inch circle craft punch to cut two "buttons"; use a real button and needle to poke holes. With embroidery floss, sew paper buttons to strip, so they're about 1 inch apart. Wrap the floss around the buttons to close.


Wednesday, March 30, 2011

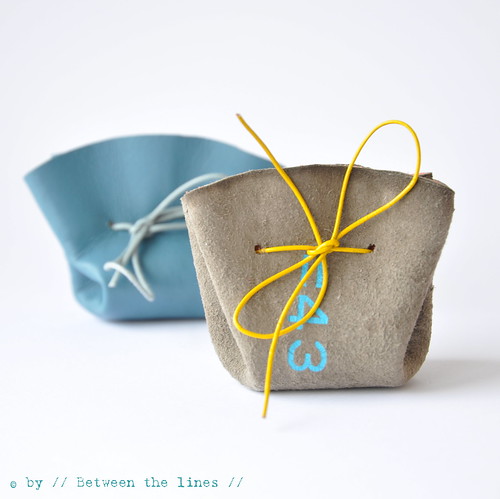
DIY Gifts | Simple Drawstring Coin Purse


what you'll need:

- leather scraps - or alternatively, any other material that will hold up, like felt, oil cloth, heavy weight cotton (which won't fray much in my opinion since it's cut in a circle)
- optional: fabric scraps and Vliesofix for the inside
- a plate, a dish or a bowl to trace the circle if you don't have a compass handy Note: for the purse in the above pictures, which is about 6cm wide and 6cm high, I used a dish with a 16cm diameter.
- leather shoe lace, ribbon, biais tape, ... for the closure
- a hole puncher
- iron
- scissors

Steps

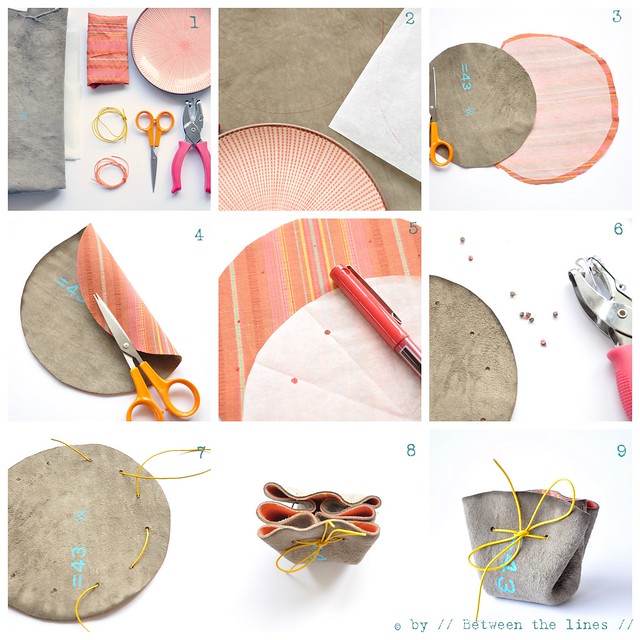
1. Trace plate, dish or bowl on the wrong side of the leather. Trace the same circle onto the paper backing of the Vliesofix, if you decide to line your little purse. ~ pic. 2
Note: for the purse in the picture I actually used the wrong side of the leather for the outside because I liked the number stamp on the back so much, the contrasting blue against the taupe color of the leather - and 43 also happens to be my age - double strike!

2. Cut out, however leaving an extra margin when cutting the Vliesofix. Iron Vliesofix onto the fabric. ~ pic. 3

3. Gently pull off the paper backing from the fabric. Do not throw away the paper backing as you'll still need it later. Iron the fabric onto the back of the leather. Next, trim the edges. ~ pic. 4

4. Take the paper backing and cut out the circle you traced onto it earlier on. You will now make 12 holes in it, about 1.5 to 2cm from the edge, and equally spaced out around the curve of the circle. In order to do this somewhat precisely, however without doing the math, what I did was fold the paper circle in half, next unfold again, punch holes at each end. Fold again, perpendicularly onto the first one (to make quarters), next fold open again and punch a hole on either side. Next, fold again, unfold, punch hole - basically you fold the paper same way you would cut a pie in 12 same size pieces. Once you've punched the twelve holes, place the paper on the wrong side (the lined sized, if you lined it) of your leather circle and mark the 12 holes with a pen. ~ pic. 5

5. With your hole puncher, punch the holes, using the marks as a guide. ~ pic. 6

6. Thread your ribbon, leather shoe lace, biais tape, ... through the holes. Pull both ends so to make folds and close the circle.
Saturday, July 18, 2009

DIY PAPER VASE FAVOR BAGS


Looking for a great way to say Thank You to your guests? Why not take the time to package up some goodies up in the bags above to pass out as affordable, wedding favors. Prefer to take the paper idea and create something on a smaller scale? Try the inexpensive, wedding place cards idea below.

Instructions

Materials:

• pliers
• mini artificial flowers
• masking tape
• paper favor bags 3.5″ x 2″ x 6.75″
• patterned paper of your choice
• white glue
• solid color cardstock
• paper scissors
• white gel pen
• mini clothespins

1. Using a pair of nice sharp pliers, cut the tops off of 4 or 5 miniature artificial flowers so that they are approximately 1.5″ long.

2. Bundle flowers together and wrap with a small piece of tape. I got this cute plum roll of masking tape but floral tape or any old masking tape will work well for this.

3. Tape flower bundle down to paper bag, centered and approximately 1″ from the bottom

4. Using template, trace shape for vase onto backside of the patterned decorative paper and cut out

5. Fold under edges approximately 1/8″ and run a bead of glue along both tabs.

6. Press firmly in place onto bag over flowers. I found it easiest to hold and secure one side for a few seconds and to then press the other side down.

7. Cut a piece of 8.5″ x 11″ solid color cardstock into 1″ strips. Fold strips in half and using scissors, snip a notch at the folded end to form two paper flags. Write your message onto the flag, fill bag with contents, fold top of bag down 1/2″ onto itself 3 times and clip flag onto the front using a miniature clothespin.