Saturday, September 3, 2011

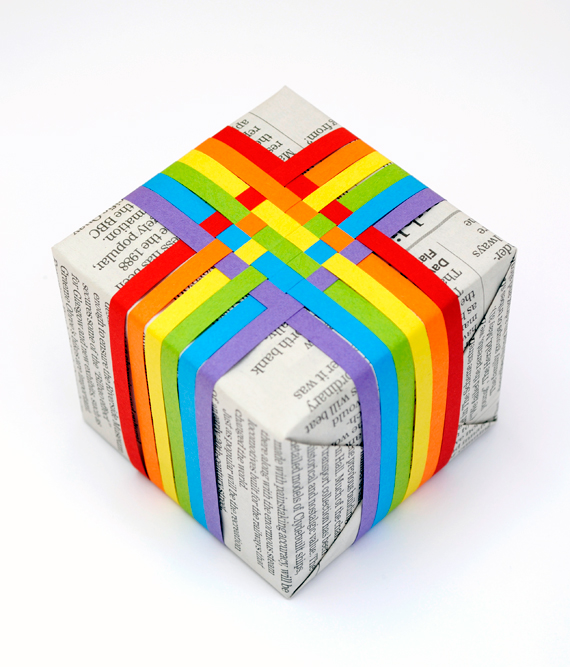
Woven paper gift topper


How-to
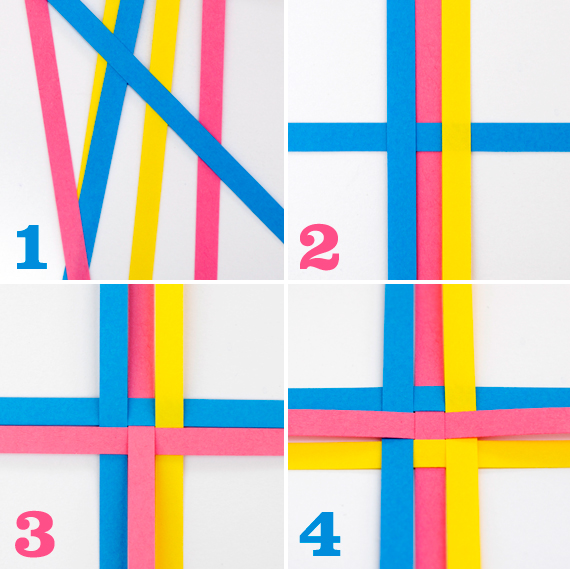
♥ Cut some strips of colored paper. Mine were 0.5cm wide. They need to be long enough to wrap around your gift. If you have a paper shredder then this might make the job even quicker!
♥ Line up your vertical strips on a table top…you can use a bit of sticky tape at one end to hold them in place while you weave away.
♥ Weave the horizontal strips into the vertical strips.
♥ Using a bit of sticky tape secure to your gift. Job done!

I also made a rainbow gift topper….no surprise there then!

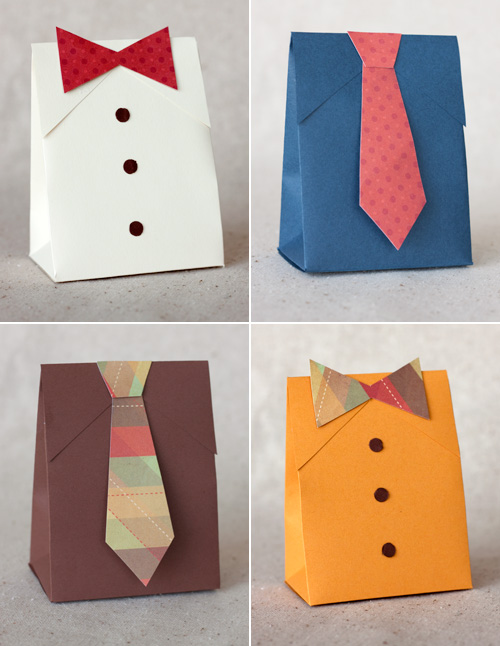
Father’s Day Shirt & Tie Gift Boxes


Supplies you’ll need:

gift box template + bow tie / necktie template

a printer
cardstock for the box and tie(s)*
scissors
a ruler
a pen or pencil
glue dots
double-sided tape
1/4 inch circle hole punch (for bow tie box)
a scoring tool (optional)
a cutting mat (optional)

Print the box template onto lightweight cardstock, cut out along the solid lines, and assemble according to the directions found in the template file. Place your gift in the box, and use double-sided tape or glue dots to securely close the flap. Print bow tie/necktie templates, cut out, and trace onto your choice of patterned or solid colored paper. Cut out the tie(s) and attach to the box flap using double stick tape or glue dots. If making the bow tie box, punch out three 1/4 inch “buttons” using a hole punch, and attach to the front of the box using glue dots (small Zots are the perfect size).

Alternative directions: Assemble the box and attach the tie to the top flap first, and add your gift last.

These boxes will hold a variety of small Father’s Day gifts, including watches, fishing lure, small food treats, gift cards, and tech gadgets like iPod Nanos or USB thumb drives.
Friday, September 2, 2011

DIY Gifts | Candy Poppers


Materials

tissue paper roll
double stick tape
scissors
1.75 x 5 piece of cardstock
ribbon
page of crepe paper
candy

Step One: Place double stick tape on crepe paper put tissue paper roll on tape and roll across crepe paper apply tape on end of crepe paper and secure.

Step Two: Twist one end of crepe paper and secure with ribbon, tie in bow.

Step Three: Fill roll with candy.

Step Four: Twist other end and secure with ribbon, tie in bow.

Step Five: Fold cardstock and cut on an angle, to create a “flag” look write message and attach tag to finished roll.


Wednesday, July 27, 2011

DIY Gifts | Summer-Inspired Favor Boxes


Materials
Paper Box from local craft store (not too thick)
Japanese hole punch
Fabric or paper flowers


Step 1:Gather you store-bought paper box (in a colors complimenting those of your wedding) your Japanese hole punch, and the flowers you'd like to use.

Step 2: Build your box, and become familiar with the piece that will be the top. Using your Japanese hole punch, punch several holes in the center of the top flap of the box.

Step 3: Separate the flower stems and feed 1-2 into each hole you've punched.

Step 4: Flip over the flap. On the inside of the box, cut the wire stems short and twist them into one stem so they don't hang down into the box and interfere with your favors.


Tuesday, July 26, 2011

DIY Gifts | Favor Flower pots


Nope, not just any old flower pot. We decided to give the typical (and cheap) terra cotta pots a fresh coat of paint... in your signature wedding color, of course! The best part: it's chalkboard paint! Write a note of thanks or use it as a place setting and scribble your guest's name. How convenient!

Materials
Terra cotta pot
Chalkboard paint
Paintbrush
Flowering plant
Chalk

How-to
Step 1 Buy your pot and pick your paint color (you can get pretty much any color you want!
Step 2 Give the pot a coat of paint. Set aside to dry.
Step 3 Add in a plant.
Step 4 Write your personal message!

Sunday, July 24, 2011

DIY Gifts | Washi Tape Containers


Materials
Washi tape
Scissors
Metal tins (or any container you like!)
Candy, nuts or any favorite treat

How-to
Step 1 Fill up the containers with your favors.
Step 2 Break out the washi and decorate those favor packages. Go on and work the tops and sides! Voila!