Monday, November 30, 2009

Tea Tins


Materials

2.6″ Round Tin
Full Sheet Labels
Round Tea Bags
2″ Hole Punch
X-Acto Knife
Straight edge
Healing Mat
Color Printer
Vellum Paper (optional)

NOTES:
The tea tin requires 2 labels: (a) 2″ circle for the top AND (b) 6″ x 1″ rectangular to wrap around the side

Instructions

1. Create artwork for the top and side labels. Since you have 2 areas to work with, the possibilities are endless. Keep in mind though – if the tin is sitting on a table – the tops will be more visible than the sides. Suggested: Put your name or initials on the top and the kind of tea on the sides.

Tips about preparing artwork for print: If your design has bleeds (artwork that flush with the edge of the label) make sure you extend your artwork past the “cutline.” This allows you to avoid those pesky and unwanted white edges for when you trim the labels. Also, include cropmarks to guide you in cutting out the rectangular label.

2. Print out your designs – in color – onto the full sheet labels.

3. Using the 2″ circle punch, punch out the circular labels for the lid. To ensure your punch is centered, turn it upside down so you can see the design and where you are punching.

4. Adhere the circular label to the center of the tin’s lid.

5. With a straight edge and x-acto and using the cropmarks as guides, cut out your wrap labels.

7. Adhering the wrap label is a little trickier. Start in the center but allow the label to touch just enough so that it is barely sticking. This allows you to make adjustments so you can ensure the label is positioned squarely with the tin. Once straight, press the label from the center to its outer edges until it wraps all the way around.

8. Fill the tin with just enough tea bags (about 10 bags).

Optional…You can also include a round vellum insert to sit on top of the tea bags. This gives you another area to add artwork or information such as instructions on steeping the tea or a personal note from the bride and groom!

Saturday, November 28, 2009

Potted Banana Bread


Supplies

-ingredients for bread (any quick bread…doesn’t have to be this recipe)- grocery store
-medium sized terra cotta flower pots- Walmart $.45 each
-wax or parchment paper-grocery store
-pretty ribbon- craft store

Directions

(yields five medium potted loaves…multiply according to however many guests you’re expecting )

-buy meduim-sized terra cotta flower pots ($0.45 @ Wal-Mart). Make sure to take off any stickers and wash well. Stuff a small ball of wax paper into the drain hole in the bottom of the pot.

-make bread acording to directions: Kona Banana Bread

2 c. sugar
1c. butter (or 1/2 c butter, 1/2 c. Crisco)
3 eggs
6 very ripe bananas
2 tsp. baking soda
2 1/2 c. flour
1 tsp. salt
1 c. broken walnuts

Mash bananas in separate bowl. Cream together butter, sugar, and eggs. Add bananas and beat well. Add dry ingredients and mix only until smooth. Stir in chopped nuts. SEPARATE INTO 5 MEDIUM SIZED FLOWER POTS). MAKE SURE THEY’RE GREASED WELL. Put flower pots on a cookie sheet and bake @ 350 degrees for about 50 minutes, or until toothpick comes out clean when poked in.

-Let cool on a cooling rack

Cut 8.5×8.5 squares of wax paper. Put over the top of the bread, and fasten with pretty ribbon.

Thursday, November 26, 2009

Wristlets and Boutonnieres


Materials

(All these items are available at most leading craft stores)
• 22″ lengths of ribbon
• Small artificial flowers in matching colors
• Small artificial leaves
• Range of pearls, beads and small ribbon flowers
• Feathers in co-ordinating colors
• Small dried twigs and dried grass (found in your garden)
• Green floral tape, available from most floral warehouses
• Co-ordinating ribbon to wrap around the boutonnières
• Favor boxes
• Glue gun
• Scissors

Steps for the Wristlets:

1. Seal the edges of the ribbon lengths with a lighter so they don’t fray.
2. Cut several flower heads from their stalks so they’re flat underneath.
3. Find the center of the ribbon length and start gluing the flower heads on in any pattern you like.
4. Glue some pearls or beads to the center of the flowers, or to the side, making sure to keep design balanced.
5. Cut pieces from the feathers and glue them in under the flower heads.
6. Cut the stalks off the leaves and glue a few in under the flowers.
7. You can glue several flowers together right in the center of the wristlet (for a more ‘corsage’ look), or spread them over the middle 5 inches.
8. Make sure to clear the glue ‘whiskers’ away.
9. Keep adding to heat’s content until you feel the wristlet is finished.

Steps for the Boutonnières:

1. Cut one of the flowers leaving a 2″ stalk underneath.
2. Choose a few strands of dried grass and cut the ends off leaving a 2″ stalk, same as the flower.
3. Do the same with a little twig or a few artificial leaves.
4. Dab a little hot glue at the base of the flower to semi-secure the grass, twigs and leaves together.
5. Wind the floral tape around the base of boutonnière, starting at the top just under the flower head. When using floral tape, stretch it out thin, then wrap, stretch, then wrap, rotating the boutonnière as you work. You might have to practice this a little bit before you can stretch the tape without breaking it!
6. Finish off by wrapping a matching colored ribbon around the boutonnière base, dabbing a little hot glue at the start and at the end.
7. Complete the boutonnière with a pin.

Tuesday, November 24, 2009

Candy Favor Bags


Materials

8.5″ x 11″ Full Sheet Label Paper
Color Printer
Paper Cutter
White Paper Bags (3½-inches x 2-inches x 6¾-inches, found at Michaels)
Large Red Brads (found at Michaels)

Instruction

1. Print out this template on 8.5″ x 11″ full page label sheets. Set your printer to the highest print setting to make sure your text is crisp.

2. Using a paper cutter, trim the labels to size.

3. Adhere labels to the center of your white bags, before opening the bags to fill.

4. Fill the bags with your favorite penny candy. We used little gummies that looked just like pennies that we found at CVS.

5. Fold the top portion of the bag over and punch a small hole in the center.

6. Insert your red brads to close the bags and keep them secure.

Next to these cute little bags, scatter a few wishing cards and a tray or a bowl that guests can place them in when they are done.

diy project

We’ve made this super cute wishing cards template for you to use. Just print it out on 8.5″ x 11″ white card stock and trim down to size. Voila! Coming up next, the super duper cute pie’s and coordinating tags!

Sunday, November 22, 2009

Table Number


This is not so much a DIY project as a really simple idea…using brown bags filled with fruit as either a table number OR as seating cards. Depending on the size of the bag that you buy, you can use these little treats in different ways. Either approach is just a really adorable way to bring a bit of charm to your table. This DIY is for seating cards, but really…it’s super easy to translate this project in lots of different ways.

Please note, we kept our bags without names on them, as when we created them, we weren’t sure how we wanted to use them. To complete the seating card DIY, you’ll need to write in your guests names above the number. If you want to use the scalloped hole punch, we’ve allowed enough room on the template for you to do that. Otherwise, we used little dotted lines that are super cute and you can simply cut around them for a pretty darned great look.

Materials

Mini Brown Bags (found at Michaels)
Strawberries
Tissue Paper
8.5 x 11″ Card Stock
2.25″ Square Scalloped Hole Punch (found at Michaels)
Color Printer

Instructions

1. Using your color printer, print out this template. Note that we have left room above the numbers for you to write in the names.

2. Using your hole punch, punch out the squares. Or alternatively, using a paper cutter, trim around the dotted lines.

3. With double stick tape, adhere the labels on to your brown bags, right in the center.

4. Using a red or black pen, scribble in the name of your guests above the number. Don’t worry about being too perfect, this project is all about charm.

5. If you don’t want to fill completely with fruit, stuff the bottom half of the bags with red tissue paper, then fill to the brim with strawberries.

These would look especially cute with cherries!

metallic wrapping paper


i love the high & low combination of brown kraft paper with metallic leaf. earlier in the week i mentioned that once you start applying bits of leaf here and there you won’t stop. it’s just addicting. when you give a gift that looks special it creates an enjoyable experience for that person. it’s totally worth it. what you will need (for paper):

brown kraft paper (or reused brown paper bags)
imitation silver metallic leaf
imitation gold metallic leaf
size (adhesive for leaf)
dish sponge
scissor
paint brush
twine
twigs

1) cut your sponge into various circle shapes (or other shapes). dab
the sponge in the size and press onto paper. it’s up to you what kind
of pattern you want to make. random or repeated. have fun with it. it
dries clear (but slightly darker so you will know where the adhesive
is). set aside let dry.

2) when it’s dry (5-10 minutes) take your leaf and press onto the
size. the leaf will stick to it and you will be able to brush the
excess away. you can utilize the excess by brushing it onto your next
“adhesive shape”.

3) instead of ribbon i chose to use twine & twigs that i tipped with
gold. (repeat step 1 & 2)

4) when your paper is dry you’re ready to wrap you’re gift. tie a bow
with the twine and place your twigs in the center. you will have a
beautiful gift that the person you’re giving it to will feel guilty
for opening. (it’s ok, that just means you’ve done a good job.)

window message board


What you’ll need:

1. An old window or picture frame
2. Fabric for background and fabric for appliqué (if using)
3. Fusible webbing such as steam a seam if adding an appliqué
4. Scissors
5. Staples and staple gun

window

What to do:

1. I already had this old window but you could use any sort of window or decorative frame – even spray paint it to add a splash of color. I like the rustic look and left mine as is. Measure the frame and add about a ½” to the dimensions and then cut your background fabric down to size.
2. Next cut out some interesting flowers or a piece of embroidery for your appliqués, I used a vintage bed linen and just cut around a few of the designs.
3. Now you are going to want to iron your appliqués to the fusible webbing, each product is a little different so follow the manufacturer’s instructions and then iron the appliqués onto the background fabric however you choose. You could also embroider around the appliqués for texture and security but I didn’t this time.
4. Now iron the entire piece of fabric as smooth as possible and clean the window glass with glass cleaner.
5. Lay the window face down on a flat surface and place the finished fabric face down on top. You’re going to begin stapling the fabric to the window by placing a staple at the top middle and then stretching the fabric and place one middle bottom. Next add a staple on the middle of each of the two sides; the idea is to simply secure the fabric evenly. Next stretch the fabric tight and work your way around the window stapling the entire piece of fabric onto your frame so that it looks tight. Trim any extra fabric.
6. Go crazy making notes with dry erase markers!

Enjoy your new message board!

Monday, August 17, 2009

Seashell and Pebble Sprayed Stationery


Decorate stationery, postcards, or a travel journal using tokens collected on a recent trip.

Lay shells or stones on thick paper, and spray the area with watered-down paint. Abstract patterns emerge on the paper underneath, recalling a dappled sky.

Sprayed Stationery How-To
1. Cover your work surface.

2. Add 1 teaspoon acrylic paint to a small spray bottle. Fill halfway with water; shake to mix. (For a more translucent solution, add more water.)

3. Arrange shells or pebbles on note cards or another paper item.

4. Spray paint mixture over shells or pebbles. Let dry for about 30 minutes before lifting objects.

Tip: Card stock or other thick paper works best; it's less likely to warp.

Saturday, August 8, 2009

Pretty Paper Bowl Gifts Ideas

Surprisingly easy, the papermaking process takes just minutes and can be fun for kids, too. Then form your paper into all kinds of paper crafts for your home or for gift giving.


Tear and press wet pieces of rolled pulp sheet onto a bowl placed upside down and covered with plastic wrap. Let the pulp dry, then remove a new molded bowl.

TIP: To strengthen finished paper projects, coat them with decoupage glue. (Papermaking instructions start on slide 7.)

Friday, August 7, 2009

In the Bag | Gifts Ideas

Shiny boxes have their place, but sometimes you want to hint at the gift inside the wrap. So transform ready-made voile drawstring bags into fun packaging with this simple embellishment. Stitch 1/2-inch tinsel pom-poms to the outside of the bag. Enclose a small gift and add a round, metal-edge vellum gift tag for the finishing touch.

Thursday, August 6, 2009

Under the Tree | Gifts Idea

Sparkling versions of a holiday tree disguise bottles of cider or wine in one fell swoop. Use pinking shears to cut three 17x17x8-inch triangles from felt. Glue together the edges (leaving the bottom open) and tack on sequins, glitter, or other embellishments.

Wednesday, August 5, 2009

Baked with Love | Gifts Ideas

Bake a batch of cookies and wrap them up in felt to give away. Tie the ends with ribbon, then cut the extra fabric into strips. Or glue ribbon in a spiral around the package and add a metal tag dressed up with scrapbooking supplies.

Tuesday, August 4, 2009

Small Packages | Gifts Ideas

This beaded-top box is so elegant, it can live a second life storing jewelry. Cover the bottom of the box with gift paper, then paint the top of the box to match. When the paint is dry, brush on white crafts glue and adhere glass seed beads.

Monday, August 3, 2009

Stamp Art Valentines | Idea Gifts

Make your mark with help from a personalized stamp. Household items and a few art supplies are all you need! Check out the following three slides for detailed instructions.


Step 1 : Cut a foam grocery tray to 3 by 4inches. Have your child write a note backwards in pencil, pressing deeply into the foam. (Write words on paper and hold up to mirror to see reverse text.)


Step 2 : Brush a thin layer of paint across the surface of the foam, covering it evenly from edge to edge.


Step 3 : Press and rub paper, label, or tag on top of painted foam, applying some pressure. Peel back and let dry. Repaint before each print, changing the color if desired. Attach to small bags of candy or other gifts.

Decorate Die-Cut Boxes

Create fun, festive mini gift boxes using die cuts or patterns. Many local scrapbook stores have die-cutting systems and large box dies that you can use. Or, use the same embellishments to dress up store-bought boxes. Glue decorative papers to the sides, then finish the look with a glittery initial in place of a gift tag.

Sunday, August 2, 2009

Elegant Ribbon Roses

Make ribbon roses to fill oversize bowls. For the roses, start with 5-inch-wide wired ribbon cut 60 inches long. Pull the wire on one side of the ribbon, roll it into a rose shape, and tack the ends.

Saturday, August 1, 2009

Fabric Envelopes


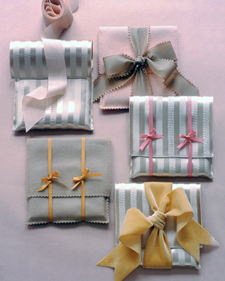
Well-chosen compact discs are always appreciated gifts. Personalize the CDs by slipping them into delightful hand-stitched pouches. The soft envelopes can be used over and over, as sachets or as small cases for travel toiletries. You can also vary their size and shape to fit blank books, pencils, diaries, or eyeglasses.

These pouches can be made out of wide ribbon or felt. For a ribbon pouch, you'll need a piece that is 6 inches wide and 17 1/2 inches long. Make a small hem at each end; to make the hem, turn the raw edge under 1/8 inch, press, and stitch close to the pressed edge. For a felt pouch, cut a piece 6 1/2 by 17 1/2 inches.

With wrong sides together, fold fabric 5 inches from the bottom; press. Pin each side; for ribbon, stitch as close to edges as possible. For felt, use a 1/4-inch seam allowance; trim seams with pinking shears. Place CD inside, and fold top flap over. Finish with a wide satin ribbon tied into a bow or a velvet ribbon tied into a knot. Or tie two narrow ribbons into bows, using tweezers to make crisp loops.

Thursday, July 30, 2009

Guest Room Gifts | Making gifts


When guests travel, they'll naturally have the essentials with them, as well as a few niceties for added convenience or comfort. But as weddings editor Darcy Miller suggests, placing a small, inexpensive gift package in each guest's room will complement their own effects with a luxurious touch.

One idea is to stack three different-size boxes with a selection of snacks. You might consider including gourmet or homemade cookies (include a recipe card if they're homemade) in the largest box, pistachios in the medium, and chocolate-covered raisins in the smallest. Wrap strips of wrapping paper around each of the boxes, stack them in graduated order, tie them together with ribbon, and affix the boxes with tags.

Darcy also suggests collecting just the right ingredients for a "warm welcome" basket -- the ideal greeting for a winter wedding. Start with a large container of hot cocoa and a bag of mini-marshmallows, measuring them out into individual serving sizes and placing them in small cellophane bags. Seal the bags with double-sided tape, and add a label made from card stock. Cut the card stock so it's 2 inches wide and the same length as the width of the cellophane bag. Fold the label in half lengthwise, and use the double-sided tape to attach it to the top of the bag. You can also include two mugs, each filled with a pair of new, cozy socks. The cocoa and the mugs can be packaged in a small wooden compact-disc crate, lined with natural excelsior.

A third idea is to create a spa basket. Line a sinamay basket with decorative paper. Purchase travel-size bottles and fill them with bath gel, shampoo, and lotion, adding a label to each. You can also add a bundle of bath salts, individually packaged bars of special soap, a loofah pad, a small scented candle and matches, and a card printed with a few basic yoga stretches.

We offer the following file in a PDF. To view and print the file, you'll need Adobe Acrobat Reader, which most browsers already include. If you have trouble downloading the file, or if you'd like an upgrade, you can obtain the software for free from Adobe's website.

Tuesday, July 28, 2009

Idea Gift Wrapping | making gifts 2


Craft-store project: Personalize wooden tags with stick-on letters.

Sunday, July 26, 2009

Compact-Disc Card | making gifts


An allowance for concert tickets or for a new CD will charm the music lover on your list.

Compact-Disc Card How-To
1. Use a real CD and liner notes as templates. Outline unfolded liner notes on heavy gift wrap; cut out, fold in half, and slide into an empty CD case (available at record stores).

2. Outline CD on heavy card stock, cut out, and add greeting. Fold money into a square; center it atop cardboard disc; with a pencil, mark position of corners. Using marks as a guide, cut four 1/2-inch diagonal slits in the cardboard. Tie a bow around money square, and slip into disc as shown.

Friday, July 24, 2009

Idea Gift Wrapping | making gifts 1


Bright construction paper becomes an offbeat ribbon with the help of a hole punch and some double-sided tape.

Wednesday, July 22, 2009

Figure Eight


The figure eight, with its concentric loops, has just a touch of the rococo.


How-To: Step 1

Form a loop at one end of ribbon; then, glue in place using Magna-Tac glue.

Monday, July 20, 2009

DIY WEDDING PILLOW BOXES

Oh my…how fun would it be to have feathers thrown as you walk away for the first time as husband and wife. Not a big fan of feathers? You could substitue them for paper mache confetti, pom poms, or the traditional rice option. I love the little quote Laurie came up with to accompany your pillow boxes….


What You’ll Need
Decorative Paper (text weight, not cardstock)
Cardboard Pillow Boxes (I used 3″ x 3.5″ x 1″)
Ribbon
Feathers
Scissors or X-acto knife
Paper glue
Pencil

Resources:
The ribbon is from the Martha Stewart Craft collection. It’s a woven ombre and the color is brick/moonstone.
The papers I used are made by Anna Griffin Inc and Screen Prints.
Feathers are available at any craft store.
Pillow Boxes can be purchased online though The Paper Zone or Packaging Specialties

Instructions
1. Use one of your pillow boxes as a template. Lay it down on your decorative paper and trace around it using a pencil. Trace two for every pillow box you will be covering. (see figure 1)
2. Cut the shapes you just traced using scissors or an X-acto knife. (see figure 2)
3 Coat one side of your box with a thin, even layer of glue and adhere one of your papers. Repeat this step on the opposite side of the box.
4. When the glue had completely dried, close one end of the box by folding in the pre-scored flaps. (see figure 3)
5. Cut a length of ribbon, wrap it around the middle of the box a couple of times and tie it off with a knot, and then a small bow. (see figure 4)
6. Fill your boxes with feathers, leaving the ends of the feathers sticking out. (see figure 4)
7. Use your computer and printer to create a small tag for your box with instructions for your guests. For my tags I wrote “When the newly weds walk your way, toss these feathers and shout ‘HOORAY”. Cut out your tags and stick them on using a dot of glue. (or you can print on label sheets and stick them on your boxes) (see figure 5)
8. You can also create a larger sign with instructions to place near your displayed boxes. (see figure 6)
9. Arrange your “feather pillows” in a box, bowl or basket for your guests to take. Have your guests shower you with feathers as march back down the aisle as newly weds, or as you depart at the end of the evening. (see figure 7)

Sunday, July 19, 2009

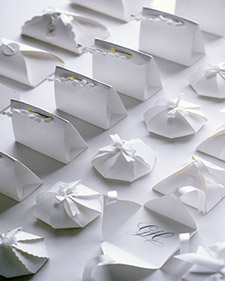
White Favors: Small Packages How-To


Use any basic card stock for all of these small boxes.

Pyramid Box
1. Enlarge the template, trace it onto paper, and cut it out. Make slits as marked with a utility knife. Using a bone folder, score the paper on the dotted lines.

2. Fold up all four flaps, forming a pyramid. Cut two pieces of ribbon, each one long enough to wrap around the box. Starting on what will be the inside of the box, slip one ribbon through a slit, wrap around outside, and slip through opposite side. Pull ribbon so two sides come together; tie. Thread second ribbon through remaining two sides, wrapping around outside; pull ends together, and tie. Tuck excess ribbon into box.

Pyramid Box PDF

"Kiss" Box
1. Enlarge the template, and trace it onto paper. Working just outside the lines, cut out the shape with paper edgers of your choice. Punch holes through ends of flaps as marked. Using a bone folder, score paper on the dotted lines.

2. Fold up all flaps. Cut ribbon a little bit longer than the diameter of the bottom of box; thread it through all the holes. Cinch two ends of the ribbon until sides close the "kiss." Tie a bow.

"Kiss" Box PDF

Long Box
1. Enlarge the template, and trace it onto paper. Cut out the left and right flaps with scissors. Using paper edgers of your choice, cut the top and bottom flaps just outside the lines. Punch holes in all four flaps as marked. Using a bone folder, score the bottom on the dotted lines.

2. Fold in the left and right flaps. Slide a short length of silk ribbon through the two holes, and tie the two sides closed. Fold top and bottom flaps in; tie with a second piece of silk ribbon. Finish with a bow and a little paper "button" or tag.

Long Box PDF

Curling Ribbons


These trimmings are same ol', same ol' in the world of gift wrap, but a few twists can turn them into something new. Concentric loops, held together with a staple, impart a modern look. Long teardrop shapes are unabashedly pretty. Accordion folds make a flower or a lone sunburst rendered in ribbon. As for loose spirals, there's only one rule: The more, the merrier.

Give It a Whirl
Bend wide ribbons (which hold their shape) into a geometric medley, or repeat one shape for a bold statement. Affix with double-sided tape, hiding staples with more loops of ribbon.

Loop-the-Loop
For a concentric design, make small circles, then larger ones, working from the spool and holding the ribbon at the bottom.

Staple at bottom (use a mini stapler if a larger one won't fit); trim end of ribbon.


For teardrops, hold ribbon in middle, and loop to either side; staple in middle; trim.


Cascading Curls
Run a scissor blade down ribbon, from middle to ends, varying the tension for tight or loose curls. Gather ribbons; cinch in the middle with a length of thinner ribbon. Affix with a hot-glue gun.

Saturday, July 18, 2009

DIY PAPER VASE FAVOR BAGS


Looking for a great way to say Thank You to your guests? Why not take the time to package up some goodies up in the bags above to pass out as affordable, wedding favors. Prefer to take the paper idea and create something on a smaller scale? Try the inexpensive, wedding place cards idea below.

Instructions

Materials:

• pliers
• mini artificial flowers
• masking tape
• paper favor bags 3.5″ x 2″ x 6.75″
• patterned paper of your choice
• white glue
• solid color cardstock
• paper scissors
• white gel pen
• mini clothespins

1. Using a pair of nice sharp pliers, cut the tops off of 4 or 5 miniature artificial flowers so that they are approximately 1.5″ long.

2. Bundle flowers together and wrap with a small piece of tape. I got this cute plum roll of masking tape but floral tape or any old masking tape will work well for this.

3. Tape flower bundle down to paper bag, centered and approximately 1″ from the bottom

4. Using template, trace shape for vase onto backside of the patterned decorative paper and cut out

5. Fold under edges approximately 1/8″ and run a bead of glue along both tabs.

6. Press firmly in place onto bag over flowers. I found it easiest to hold and secure one side for a few seconds and to then press the other side down.

7. Cut a piece of 8.5″ x 11″ solid color cardstock into 1″ strips. Fold strips in half and using scissors, snip a notch at the folded end to form two paper flags. Write your message onto the flag, fill bag with contents, fold top of bag down 1/2″ onto itself 3 times and clip flag onto the front using a miniature clothespin.

Thursday, July 16, 2009

How to Make Your Chocolates “Bloom”


What You’ll Need:
Crepe paper ( or tissue paper)
Ribbon (1/8 of an inch wide)
Wired millinery leaves
Foil wrapped chocolates
Scissors
Low temp glue gun


Instructions

1. Begin by cutting a 6″ (approximately) square of crepe paper.

2. Fold in half, then into quarters. (See figure 1)
3. Fold in half again to make a triangle (see figure 2) and then fold in half again. (It’s just like your folding a snowflake).
4. Cut a rounded “V” in the non pointy end of the triangle. (see figure 3)
5. Unfold your crepe paper. It should be shaped like a daisy. ( see figure 4)
6. Put a foil-wrapped chocolate in the center of the daisy. (see figure 5).
7. Pull the petals up around the chocolate, and tie a ribbon just above the top of the chocolate.
8. Drop into the candy cup, and fluff your paper flower petals. Add a wired leaf around the neck to complete.
9. Arrange on a dish or place a bloom at each place setting.


Tuesday, July 14, 2009

Cute Felt Candy Storage


A simple tutorial by zakka life, on how to make a lovely felt candy tray, for displaying candy or chocolate egg minis. I love the polka dot felt that she used, which adds some spring pizzazz to this adorable felt container.

Sunday, July 12, 2009

DIY Napkin Invites


Isn’t this the cutest invite you’ve come across? A hand-drawn birthday party invitation by Bryn, which was chosen as the winning entry for the DIY Contest at 100 Layer Cake. A fabulous idea for an unique DIY invite that you can try your hands on. Three cheers for Bryn!

Friday, July 10, 2009

Fruits Memo Notes


Not only are these the cutest and sweetest fruit notes I’ve come across, they have the most appropriate name, Kudamemo, which is derived from the Japanese word Kudamono, meaning fruits. Each memo notepad sits vertically like an apple or a pear, with realistic seed design and a twig stem.

Thursday, July 9, 2009

Wednesday, July 8, 2009

Paper Sculpture Camellias


Beautiful paper sculpture by mollyjey of Italy. From flowers, animals to trees and butterflies, every piece is truly admirable. Each creation is showcased in a complimenting box frame, giving you a gorgeous, must-have work of art.

Image above is a 5 layers white camellias original paper sculpture, framed in a white box of dimensions 6.39″ x 6.39″ x 1.75″. Gorgeous!

Tuesday, July 7, 2009

Photos on Canvas


We’ve all got a favourite photo.

Why not turn that photo into a real work of art with our photos on canvas print service?

How it works

Ordering a photo on canvas print is easy:
  • You can supply the photo to us in any format.
  • We then check it can blow up to the sort of size of canvas you are after without breaking up and see if it would benefit from any: colour balancing, cleaning up, retouching, red-eye removal, cropping or even if it would look good in black and white.
  • We then email you proofs of the improved photo for your approval.
  • You choose the version you like and confirm the order by making payment.
  • We print your photo on to canvas, stretch it on to a 3.5cm deep frame hand built specifically for your canvas, carefully pack it and deliver it to you ready to hang on the wall.

    Photos on canvas print prices

    To suit all budgets we offer two types of photo on canvas prints:
    Standard canvas prints – Printed using the Giclee process.
    Premium canvas prints – Printed using the Dye Sublimation process.
    Which should you choose? – Read our photos on canvas to help you decide.
  • Monday, July 6, 2009

    How we work with you to create your Warhol style portrait


    Step 1 - The photo

    The first step will be for us to take a look at your photo and make sure we can work with it. For the best results we need to work from a clear, well lit and above all in focus photo. Please bear in mind that as a basic rule, the better the photo we receive, the better the end result will be. As the artist is working only from the photo and needs to be able to zoom in on it to find the detail, it is extremely important that the shot is clear and in focus. As a guide, if you are unable to clearly see the colour of the person's eyes, then the shot is probably not suitable. A shot with the person's head and shoulders taking up most of the frame is really ideal. Do remember that the Warhol style portrait is about the person, rather than the situation they are in, so rather boring head on shots work far better than action shots. As the portrait will hang on your wall for many years to come, it's worth taking time to get the right photo for the artist to work from! See examples of the sort of photo we need to create the best possible portrait.

    Step 2 - Composition and colours
    Once we have a photo we can work with, we will then move on to address the issue of composition and colours.
    Composition
    This is essentially about where the head sits within the canvas. To help decide on the composition of the picture we will send back a number of crops of your photo for you to consider. Some will be close crops, concentrating very much on the face, with others showing the full face and more background. To achieve the iconic Andy Warhol portrait look, a square canvas, with a head and shoulders shot works best.
    Colours
    To help you decide on colours, the way we tend to work is to send you a number of original Andy Warhol portraits to consider for colour combinations. Let's face it the man was a genius when it came to colour, so it's not a bad place to start! When you've decided on the colours you would like to see, our artist starts work.

    Step 3 - Your portrait
    About 2 weeks or so later, we would then email you back a first draft of your Warhol style portrait, using the colours you have chosen, but also showing you how it would look using some other colour combinations. This gives you the opportunity to feed back to us and to decide on the picture that you really want, before anything is printed.
    Using the dye sublimation printing process onto canvas allows us to recreate the screen printed look of the original Warhols (with their areas of dots, texture, flat colour and out of registration colours) extremely well. This process gives you a wonderful and very contemporary matt finish with the grain of the canvas showing through slightly. This looks fantastic when it's just stretched around a wooden frame and hung on the wall.
    Only when you are completely happy with the portrait is it then framed according to your request, packed up and despatched to you.
    In all the process should take about 4 weeks.

    Which size canvas should you choose?
    It is worth bearing in mind that a little bit of scale does suit these portraits. Especially with the Warhol style portraits, a bigger picture allows the artist to go into finer detail resulting in a much richer portrait.
    Because the artwork is created by a Graphic artist and the canvas is then printed, the bulk of the cost for us, is the creative development (which remains the same for either a small or large portrait) rather than the material cost of the canvas and stretcher bars. For this reason the bigger canvases can in a way be though of as better value. If you look at the table below you can see how a small jump in price, gets you a huge leap in size.
    Our recommended size in this style is 80cm x 80cm or above.

    Tuesday, June 30, 2009

    Woven Ribbon Wrap


    Here's our idea of thinking outside the box: interweaving ribbons to dress up a gift. The weaving begins with a single ribbon stretched across the top of the package, its loose ends fixed to the bottom with double-sided tape. Continue adding a few more ribbons, parallel to the first. Alternate colors, widths, and textures as you wish, but try to keep your design fairly simple so that it does not become too busy. Next, interweave another set of ribbons perpendicular to the first. Follow the rhythm of over-under-over for one, then under-over-under for its neighbor, and so on.

    Monday, June 29, 2009

    Three-Dimensional Doily Ornament


    Tools and Materials

    • Templates A and B
    • Disappearing-ink marker
    • Laminated linen or other sturdy, nonfraying fabric
    • Ruler
    • Fabric shears
    • Scallop shears
    • Neutral-colored thread
    • Needle
    • Pins
    • Twine


    Step 1

    Download templates A and B. Print onto card stock; cut out.

    Step 2

    Using template A, trace 3 circles with a disappearing-ink marker onto laminated linen or other sturdy, nonfraying fabric.

    Step 3

    Cut out 2 circles with fabric shears. Cut out remaining circle with scallop shears (or use straight-edged ones).

    Step 4

    Lay template B atop 1 smooth-edged circle. With disappearing-ink marker, mark dots on fabric where lines on template fall. Using a ruler and disappearing ink marker, connect opposite dots to re-create lines on template.


    Step 5

    Lay lined circle atop remaining smooth-edged circle; hand- or machine-stitch along lines with neutral-colored thread (we used blue to illustrate).

    Step 6

    At each sewn wedge, fold in edge of top layer; secure each fold with a pin inserted through both layers.

    Step 7

    Lay sewn circles atop scallop-edged circle. Along edge at midpoint of each wedge, tack middle layer to bottom layer. Tie off; trim thread. Remove pins; unfold top layer.

    Step 8

    With disappearing-ink marker, mark a dot at each wedge's midpoint along edge. Slip a threaded needle under and up around 1 dot (through top layer only). Repeat at next 5 dots in order (do not cut thread).

    Step 9

    Gently pull ends of thread, gathering top layer into center. Knot thread; trim. With twine, sew a loop to bottom layer, and knot to hang.


    Looped Ribbon Ornament How-To
    1. Cut a 6-foot-8 1/4-inch length of 1/2-inch-wide white paper ribbon.

    2. Starting at 1 end of ribbon and using measurement lines on a cutting mat as guides, make folds at 4-inch intervals, creasing with a bone folder. (There should be 20 folds in all, with 1/4 inch of ribbon extending beyond final fold.)

    3. Bend top end of ribbon to meet first fold, forming a loop. To secure loop, place a 1/4-inch-long piece of heavy-duty, doublesided tape where top end and fold meet. Press with fingers to seal.

    4. Bend ribbon to form another loop. Place tape between loop to secure. Press to seal.

    5. Repeat to create loops down length of ribbon (use tweezers to press if needed).

    6. Apply tape to 1/4-inch tab, and attach to base of first loop. Press to seal.

    7. Insert a length of linen thread through a loop, and knot to hang.